-
Navigate to Sales > Prospect Pathways, and click the button 'Add pathway'
 (Please right-click and view image)
 -
First, you need to select when the prospect should receive the pathway. You can do this by hours, days, etc.
-
You will need to add a subject for your email pathway, and also decide if should be sent to all prospects, or if you want to filter this by source, owner, or external form.
-
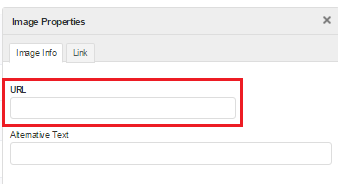
Once the conditions of the pathway have been created, you can then add your content. Please note that any images you want to be included in the pathway will need to be hosted on a website, and the URL entered by clicking on this icon:

then pasting the URL here:
-
While adding the content of the pathway, you can insert the tags on the right-hand side by clicking them. This will pull data through from the site to your pathway when it is sent.
-
You can also insert attachments at the bottom of the pathway if you would like these to be sent out with the email.
-
'Save' your pathway.
-
Your pathway will now show in the pathway list, and details of the subject, date added, and status will also be shown.
-
The 'status' of the pathway is whether it is active and will be sent to prospects, or inactive and will not be sent. This can be changed by clicking on the coloured circle. Green indicates an active pathway; Yellow indicates and inactive pathway.

-
By clicking on the dropdown arrow next to the cog in the 'action' column, you will have access to either edit or remove the pathway.


Comments
0 comments
Please sign in to leave a comment.